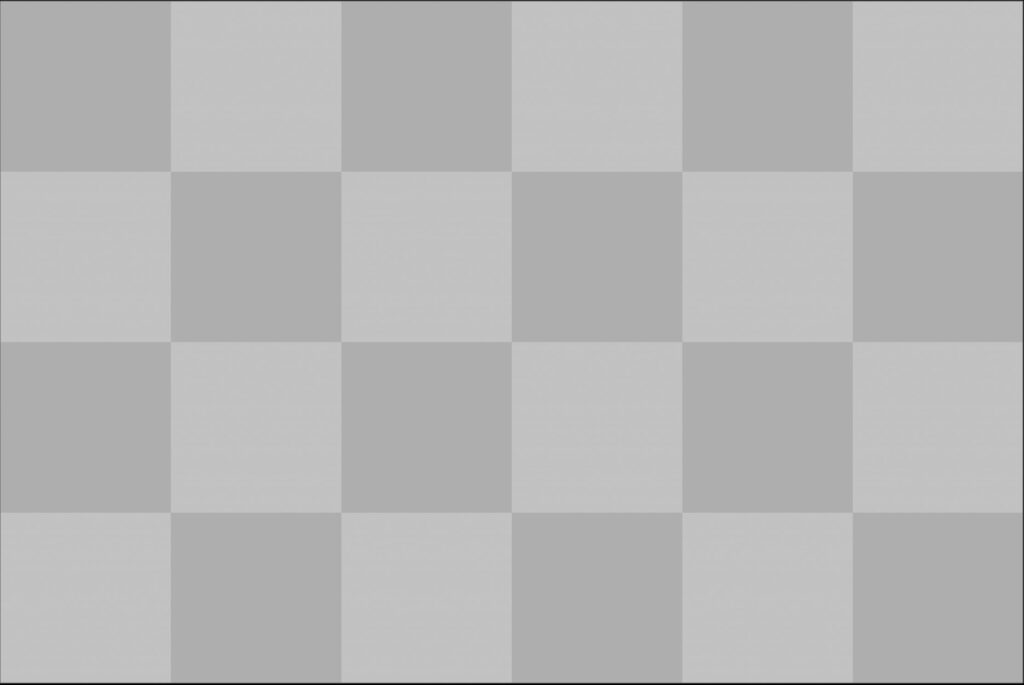
The Blur Node is a low pass filter. We use blurring to reduce high spatial frequencies, areas with a lot of contrast or noise. In order to achieve this we look at every single pixel, compare it to its surrounding pixels and create an average value. Instead of having high pixel values like white, right next to low values like black, we meet somewhere in the middle and end up with a bunch of greyish values.
Convolution
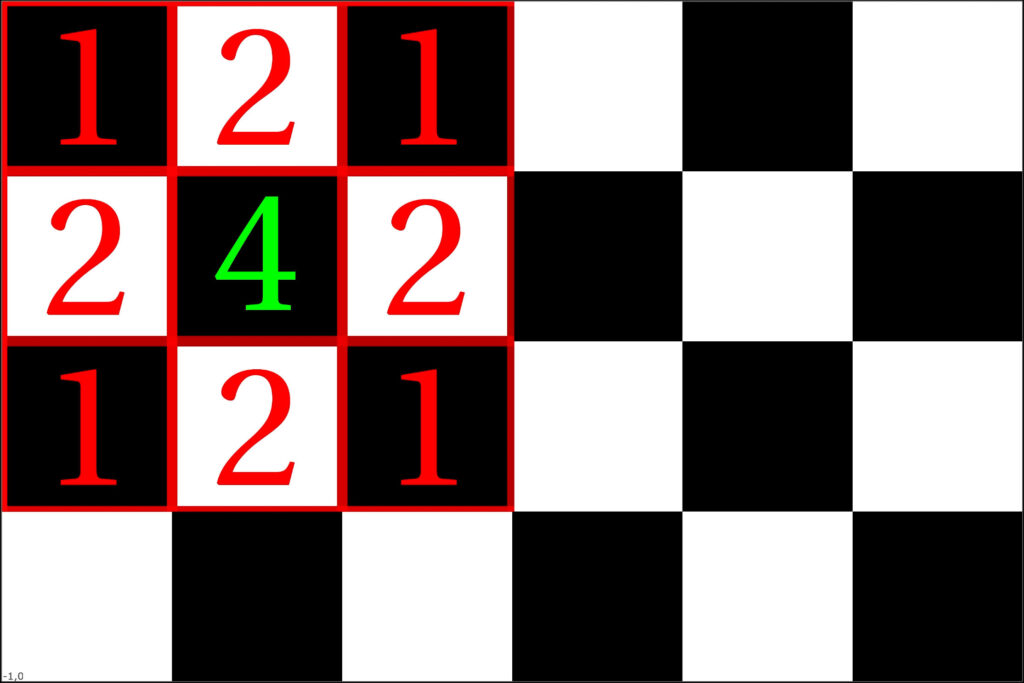
The mathematical operation behind this is called convolution, for which we need a convolution matrix, also called kernel.
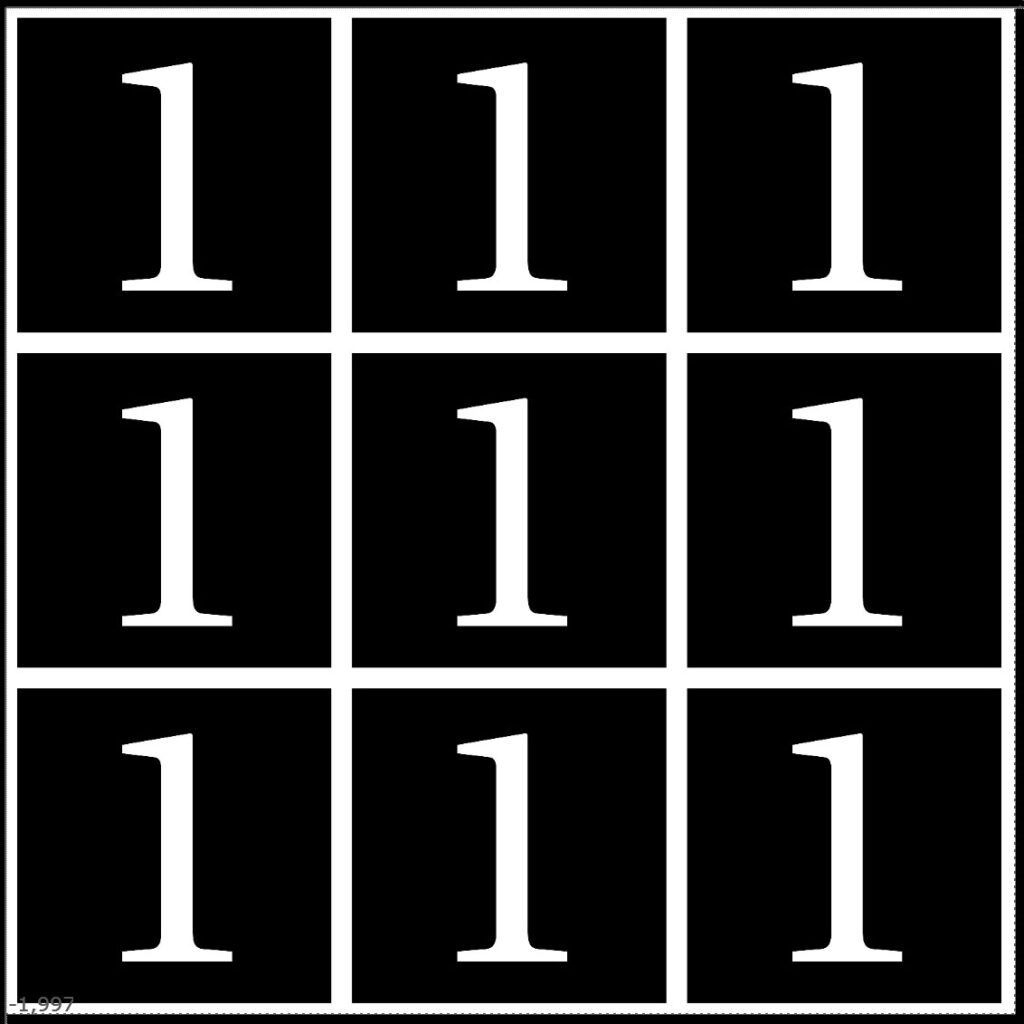
It is a small grid of numbers that gets passed over the whole image, which will get transformed based on what these numbers are. We place the grid over every single pixel, with the pixel being in the center of it and the surrounding grid numbers end up over the neighboring pixels.
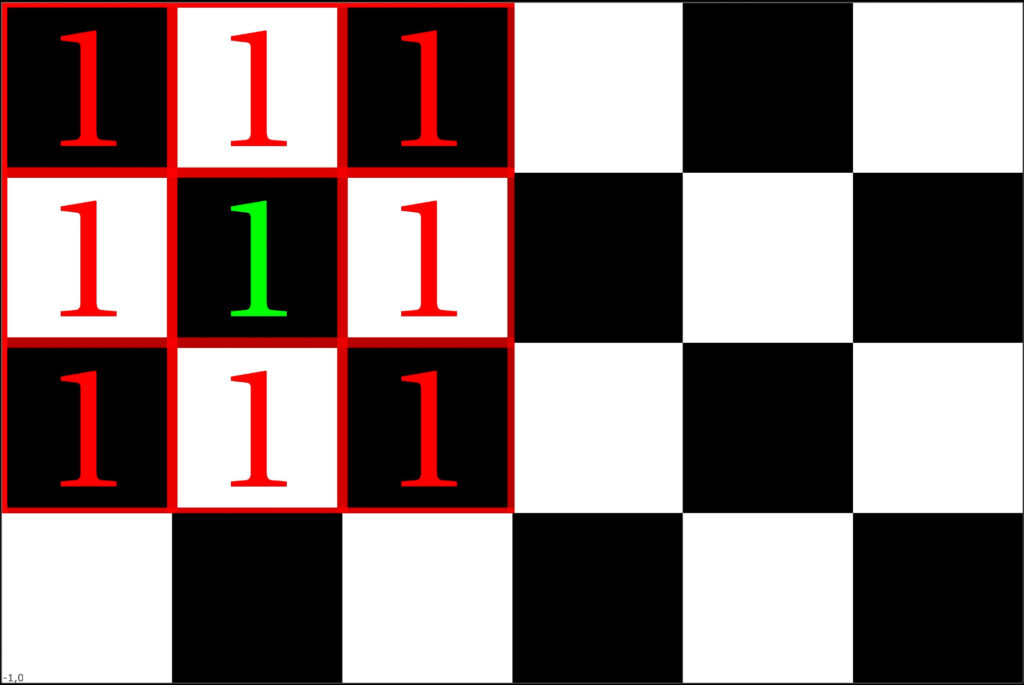
We multiply the numbers on top of each other, add them all together and divide the result by the initial size of the grid, the amount of numbers used for the grid.
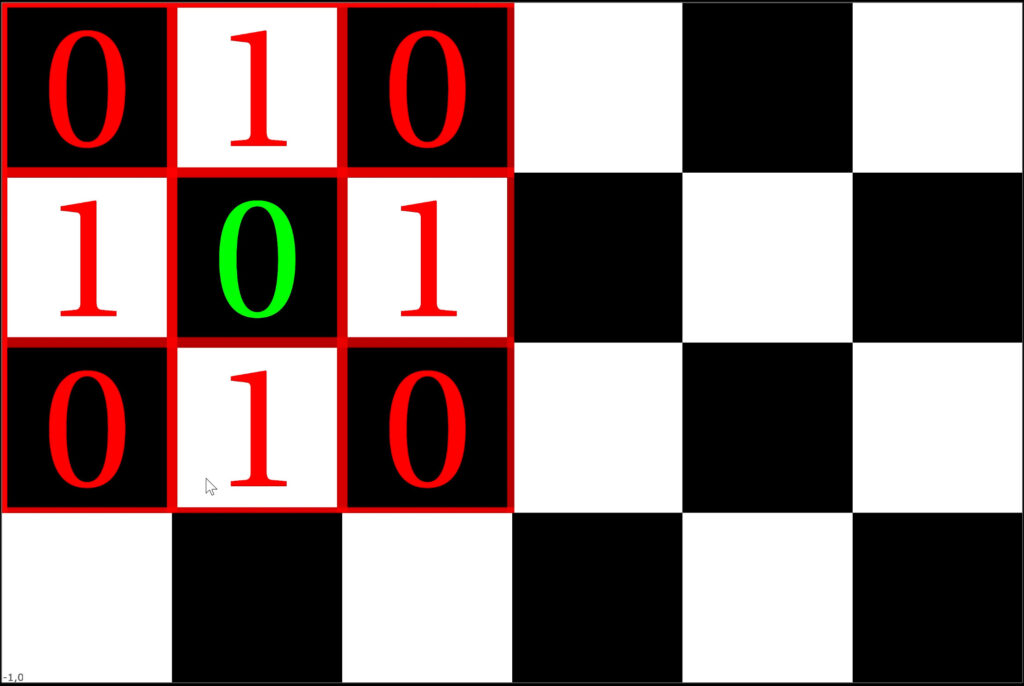
That way we end up with an average value for the center pixel in relation to the surrounding pixels.
By adjusting the numbers in the kernel, we can set it up in a way that pixels further away from the center don’t contribute as much as adjacent pixels. Having a high value in the center and decreasing it outwards forces the calculation to focus more on the pixel of interest. That way we don’t blur it too much or we can try to preserve edges better, because even if we have an area with a high contrast, we will not end up with a greyish value in the middle. The value of the center pixel will still be prioritized.
Using the Matrix Node to set up our own kernel
The matrix node is very powerful and you can use it to transform an image in all kinds of ways. The preferred grid size, Nuke is asking you for, will be the size of our convolution matrix, our kernel.
When you connect this to your image, everything turns black because the grid moves over the image and multiplies all pixel values by zero.
The most simple Blur you can create with a convolution grid is, by setting all the values to the same number. The image is back and all the pixels get multiplied with the same value.
Selecting the Normalize checkbox will make sure that the sum of all those multiplications gets divided by the total number of grid slots. This will bring the image back to it’s initial brightness level.
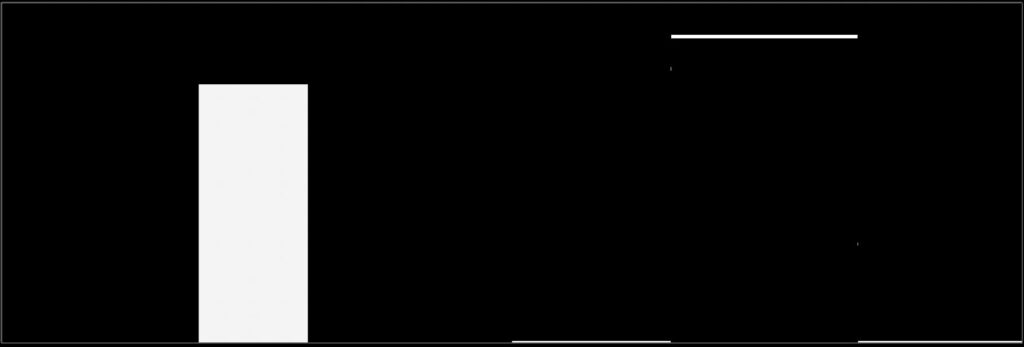
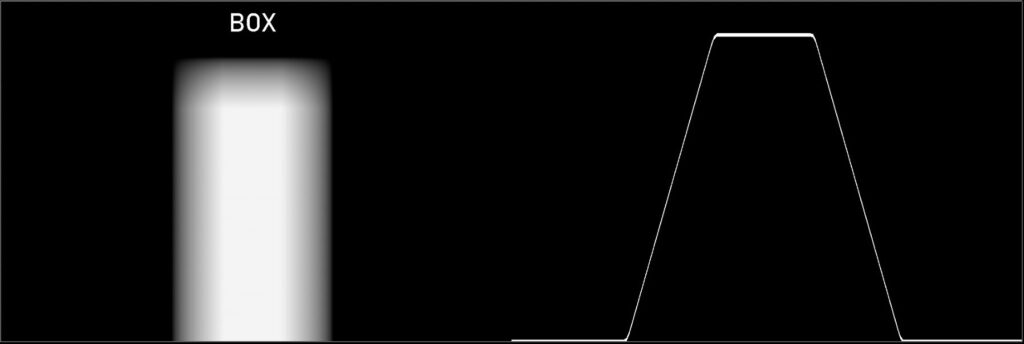
This simple Blur is called a Box Blur. Every pixel we want to process with this kernel and it’s neighboring pixels get all taken into account with the same weight. There is no falloff. So it’s distribution looks like a box.
An example for a different kind of blur would be this one:
You can see that the neighboring pixels around the center pixel get multiplied with a lower number and therefore have less weight in the average calculation.
If you compare the Box Blur with Gaussian Blur you clearly see the difference in falloff.

With the basics for convolution covered, let’s switch to the Blur node.
Filter Types
The Blur node is a very straight forward node with just a few knobs.
The size value resembles the grid size of the kernel or the matrix node which we looked at before. The bigger the grid, the more pixels get included for the averaging of every single pixel. The image turns more and more into an average representation of its original state.
The filter type is the sort of falloff we choose for our averaging calculation.
In comparison to the Matrix node which gives you total freedom for choosing all the individual values for your grid – the Blur node gives you only 4 different types to choose from.
But we will look at other ways to tweak the falloff to our liking.
We talked about the Box filter before:
The triangle filter already shows a smoother, more linear falloff:

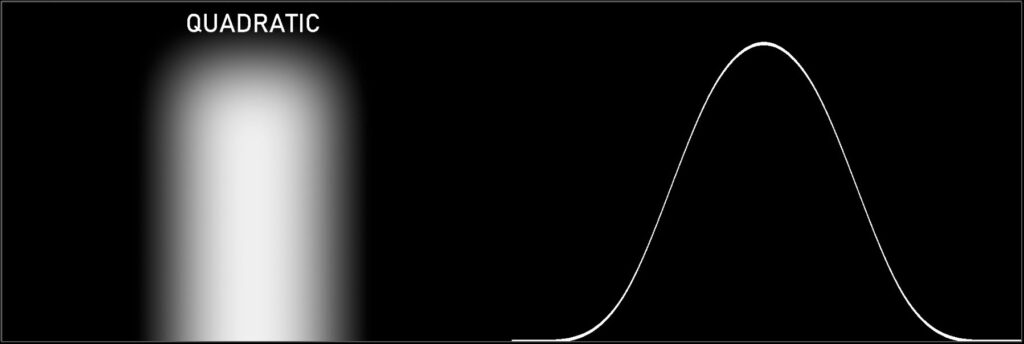
The quadratic Kernel gives a very soft result, even a bit more than the Gaussian kernel:
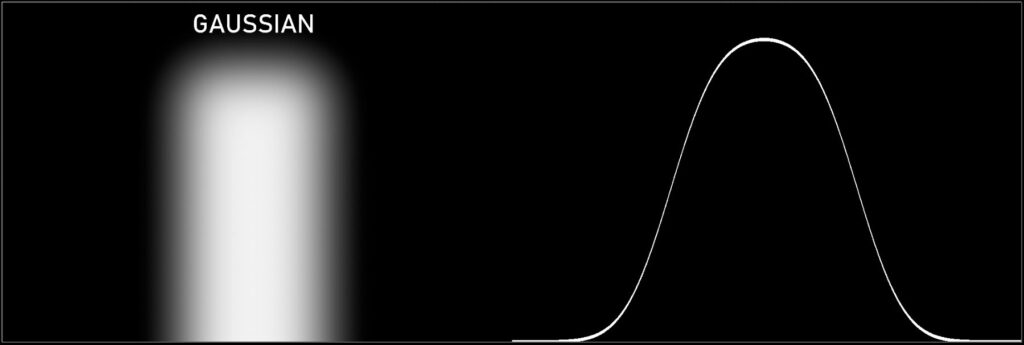
Again, the gaussian filter has a bell curve shape, so it’s weight distribution is very smooth:
Something important to mention here:
If you’re blurring a cropped image, we often end up with darker pixels near the edges. That’s caused by the Kernel taking those black pixels outside the image dimension into account for the average calculation. If you don’t want that, just use any of the notes that have the “black outside” checkbox and deactivate it. This will make sure the edge pixels get stretched outside the image and gives us a better estimation.
Falloff Treatment
If we’re dealing with edges, we can use the gamma to expand or tighten the falloff. Pinning a white point helps us to keep the shape solid where needed.
We can actually get quite creative with all the tools available.
We can use Color Lookups and its curves to map values specifically where we need them.
If we are dealing with a Blur within an image and we don’t like the distribution of the falloff, here is way to manipulate it:
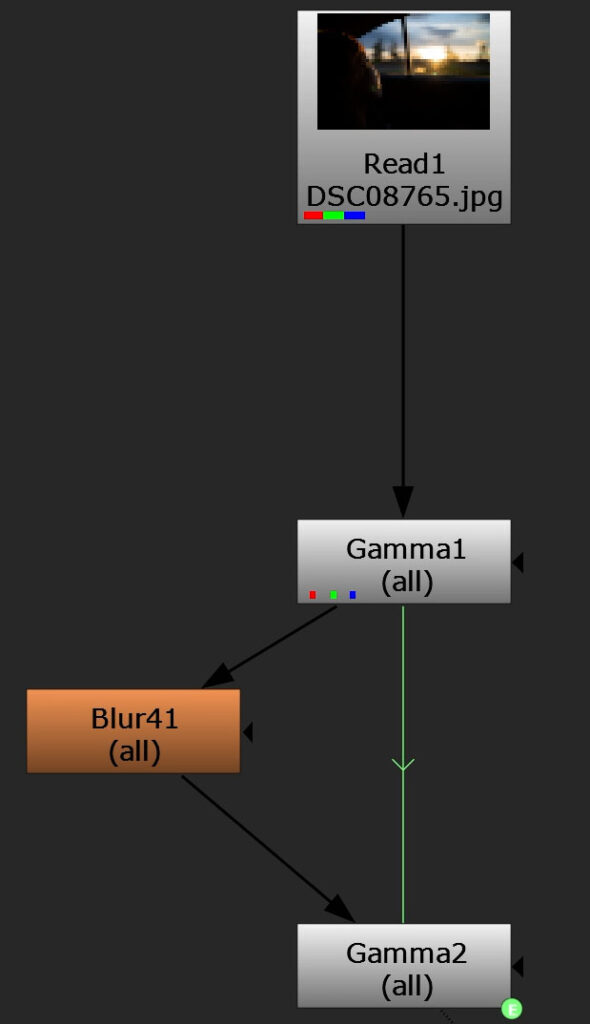
You hook up two Gamma Nodes, with the second one carrying an expression to invert the values of the first one.
1/parent.Gamma1.valueSo whatever change you do to the image with the top node, gets to reversed back to the original state with the lower node.
If you place a Blur node in-between though, you will able to tweak the difference between blurred and non-blurred image. You are basically manipulating the gamma of the blur falloff.
Just be careful to not break the image.
Quality Knob
Image convolution can get very heavy to process.
If you need to speed things up, you can use the quality slider. By default it’s set to 15. What it means is that Nuke will make sure that the Kernel size actually doesn’t get bigger than 15.
But how can you still blur an image with a bigger size then?
Well, Nuke will internally scale down the image, apply that maximum kernel size and then scale the image back up. Scaling an image also involves filtering, so you will get a smoothing effect as a byproduct. Scaling is just easier to process than huge blur convolution calculations. Pretty smart.
Part 2 will continue with interesting ways of using the Blur Node.