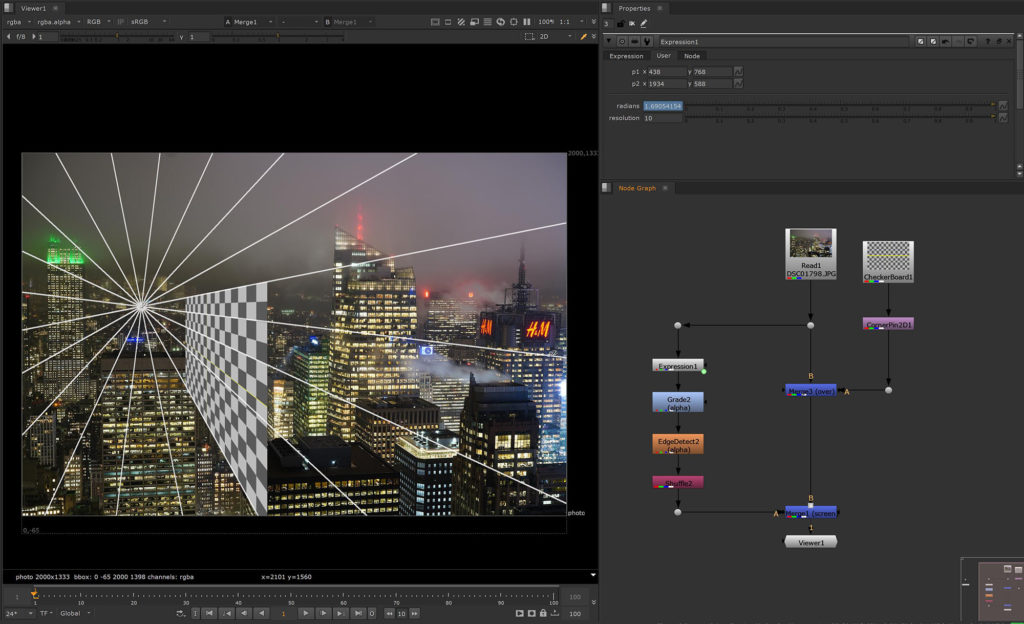
If we want to integrate 2D or 3D elements into a plate, it comes in handy if we know where the vanishing point is.
I’ll show you a quick way of setting up a visual guide, so it helps us by placing and distorting elements in the correct perspective.
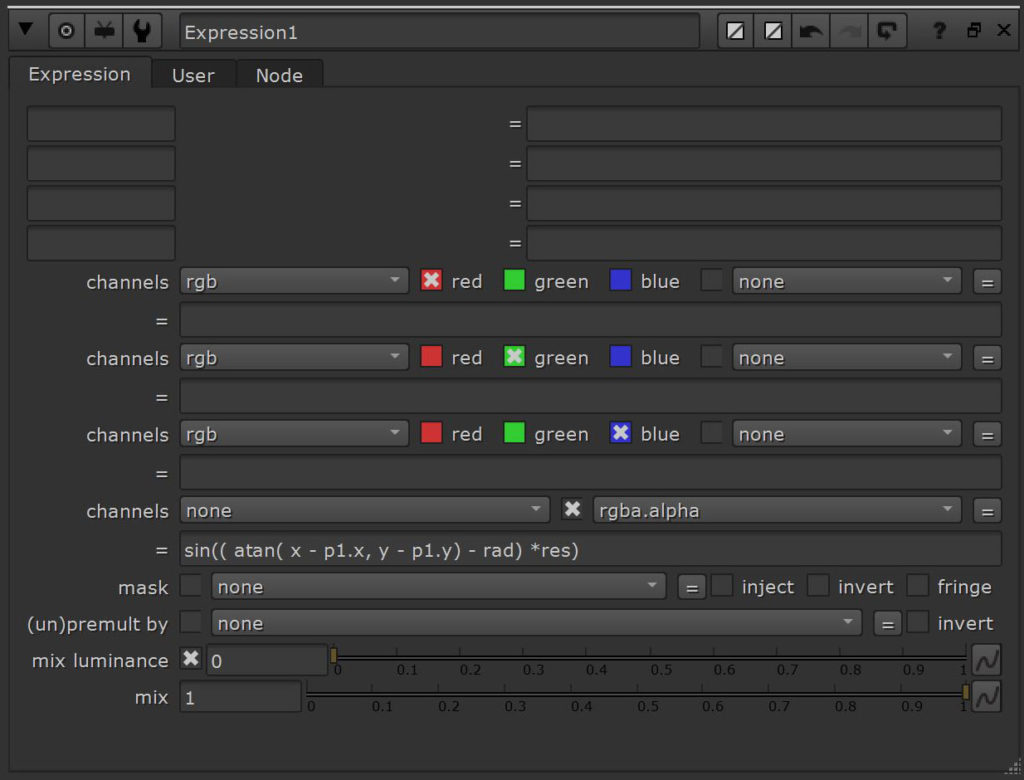
If we want to keep it simple, quick to process and procedural, we need to find a mathematical function to do this for us – so I decided to use the expression node for this setup.
Perspective lines slice through the image and culminate in a single point in the far far distance.
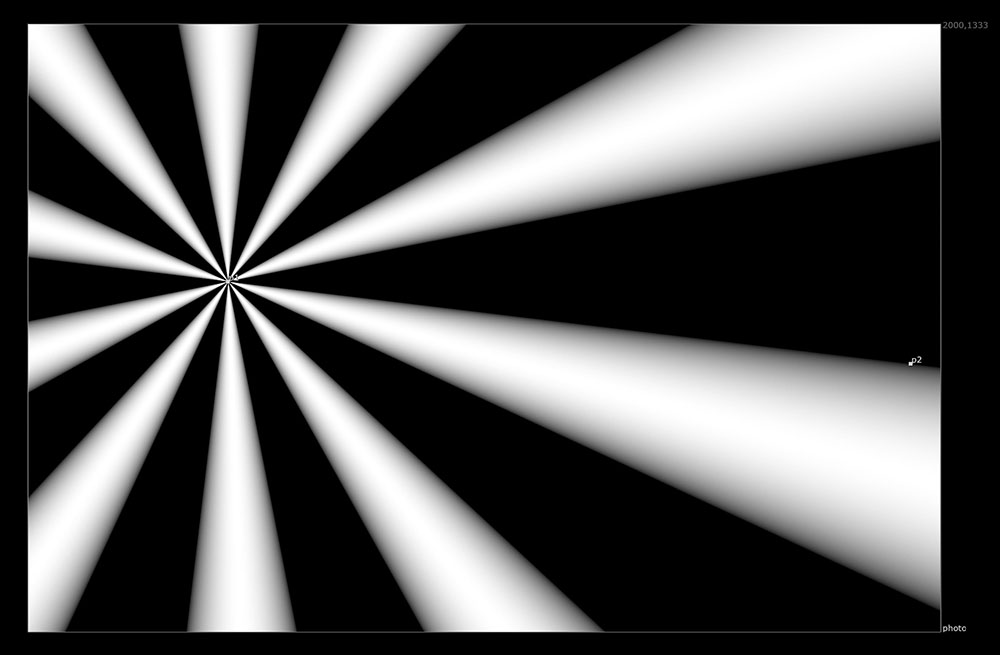
We need a repetitive pattern, for which we can define a frequency.
For this, I will use trigonometry and specifically the sine and arc tangent functions.
The arctan function is the inverse tangent function. If we know the tangent of an angle, we can use this function to calculate the actual angle.
Nuke’s x and y coordinates give us the tangent. By using them in our formula, the image output represents the angle (in radians) for every single point of our coordinate system.
atan(x,y)

#if you want to convert the output from radians to degrees, you could use:
degrees(atan(x,y))
We can now use the sine function to get to our curvy pattern. In order to actually visualize multiple curves, we need to multiply the output of the arctan function by a high factor, to increase the visible angle – let’s say 30.
sin(atan(x,y)*30)Since I want to place our vanishing point interactively, I will add a position knob (p1) to our Expression node and use it in our main expression to offset the center.
sin(atan(x-p1.x,y-p1.y)*30)I add another point (p2) to help me place one of the perspective lines right where I want to.
If I use the arc tangent 2 function on those 2 points, I will end up with a radian value representing the angle between them.
I create another knob (rad) to store this radian value by placing the following expression into it:
atan2((p2.x-p1.x),(p2.y-p1.y))If I add the output of this knob to our main expression, the angle of my control line gets offset accordingly to where I place the points.
I add another knob (res) that makes it easier for us to change the resolution of the slices – it’s just a numeric value that I can use as a multiplier for my main expression.
sin((atan(x-p1.x,y-p1.y)-rad)*res)


Now I can place my line wherever I want to, to determine the vanishing point.
For a better use I place all of this in a Group Node and add the controls, so the knobs are always exposed once I open the properties.
You can download this setup as a Nuke script (including the raw setup as well as the Group Node) here: Perspective Lines Setup
