Having a wide selection of Retiming nodes in Nuke is a great thing, but using them all over your script the default way can make things hard to read.
Let’s say we have multiple library elements (for example smoke or fire) and we want to place them in our shot.
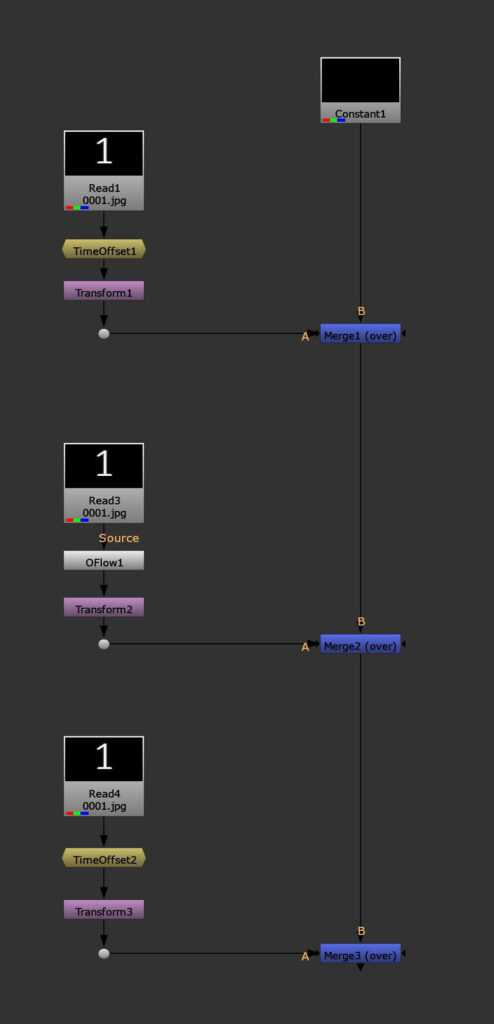
In this example, by just looking at the setup, I don’t know which frames of the element I’m actively using, when I would be running out of footage or which speed I’m looking at.
Furthermore, all of the retiming nodes have different attributes. If I’m using an Offset node and I’m happy with the actual in-point of the element, but I want to play the element twice as fast, I will have to switch to a different retiming node and need to set everything up again.
Alternatively I could solve the problem by using an expression on the Offset Node, since there is no native way of changing the speed.
I came up with the idea of using a container (a Group Node) for my retime setup and then I’ll distribute the information internally to whatever Retiming Node I chose to go for.
That way I can also set up a visual guide for me to easily see what’s going on with the element and stay consistent throughout my script.
Let me show you how to assemble it.
I use a Group Node and populate it with a couple of attributes that I will need to be in control of for my retiming.
I want to define which frame of the element will be the start frame as well as where I want to place this start frame on my comp timeline. You can look at it as the anchor point. We will still be able to also use the frame before our defined element start frame. This is just important for placement.
You usually have a specific reference frame that you use to place a certain element and you want to be in control of which frame of the element you are using right at that frame.
Then, we need a speed knob.
I also add an overall multiplier attribute, that can be useful to blend elements in or out.
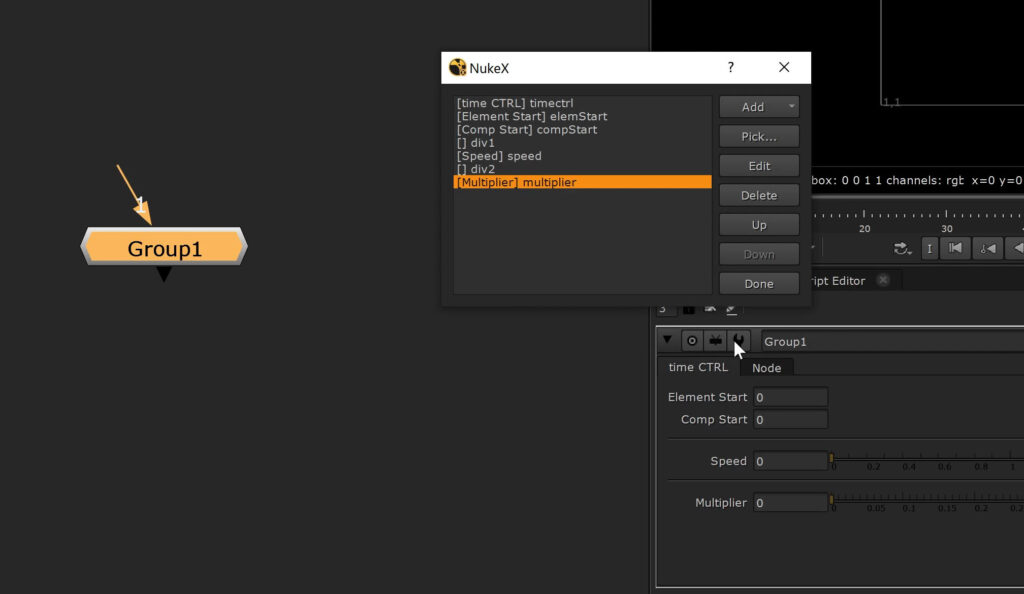
Ok, let’s leave it at that for now and let’s jump into the group.
First I create a NoOp Node and populate it with some custom knobs. I use expressions to collect the first and last frame of the incoming element.
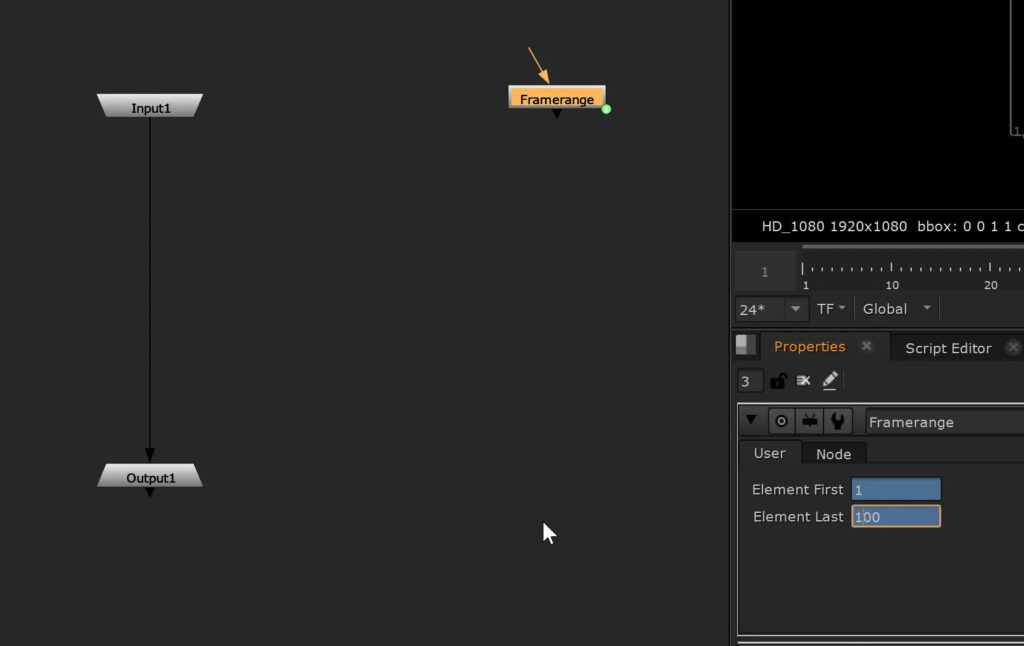
# Expression for Element First knob
first_frame

# Expression for Element Last knob
last_frame
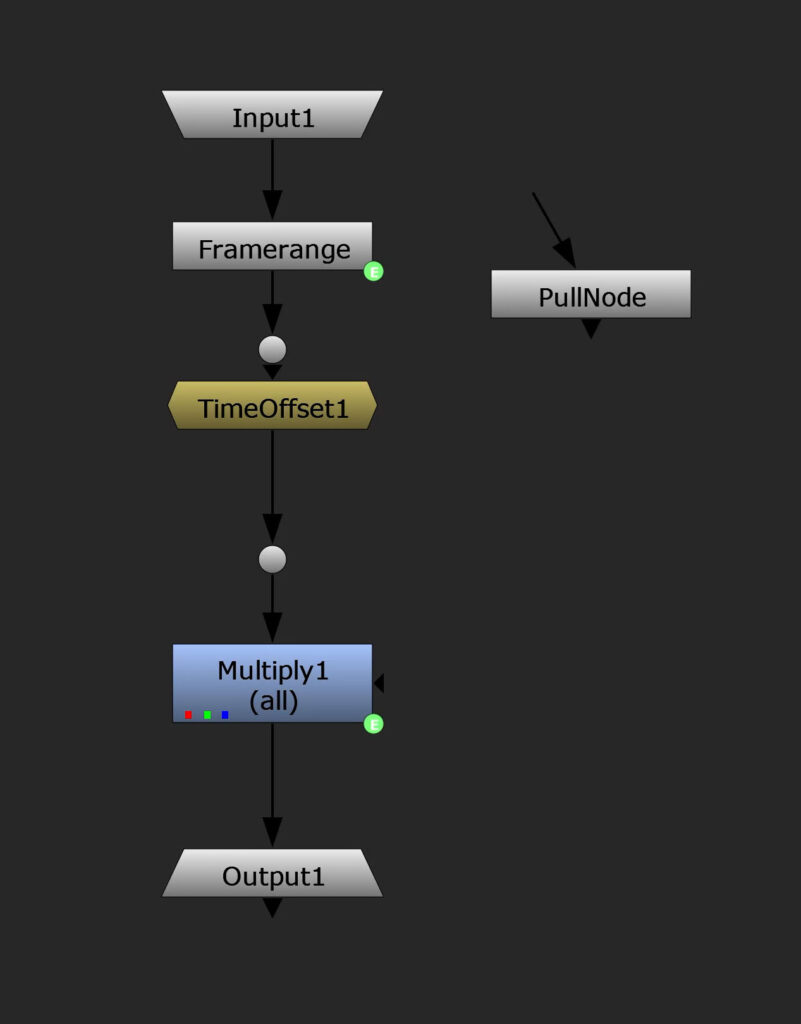
Then I create a Dot node and change the name to Dot without a number. I’ll show you later why.
I’ll drop in a TimeOffset node, so that we have a placeholder for our retiming node of choice. Next up is another Dot node.
Now we need our overall multiplier.
I’ll set the following expression, so our Multiply node gets its input from our Multiplier knob of our Group.
parent.multiplier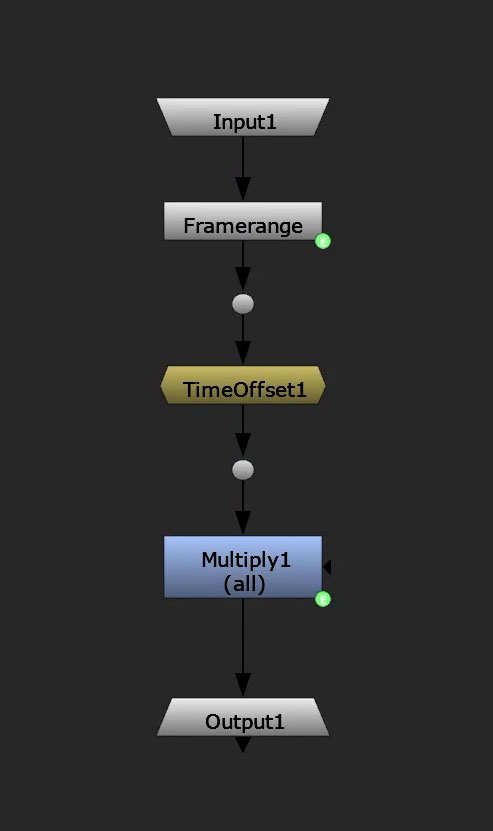
Back to Group node level.
The following section will be important for internal calculations and assignments to our retiming node under the hood. Feel free to hide these knobs later on.
The main goal is to set up a global formula that outputs the actual frame of the element we are looking at – while taking the element and comp start times into account, as well as the speed.
We can then pass it on to whatever node works with actual frame numbers for retiming.
I came up with the following expression:
((frame - compStart)*speed) + elemStartThis one only works if the speed value is positive though.
In order to be able to play elements backwards, we can extend it with an if statement:
speed > 0 ? ((frame - compStart)*speed) + elemStart : ((compStart - frame)*(-speed)) + elemStartI will also use some expressions to calculate the new in and out points of our incoming element with the retime applied.
# new in point
compStart - ((elemStart-Framerange.elem_first)/speed)

# new out point
(Framerange.last_frame - elemStart) / speed + compStart

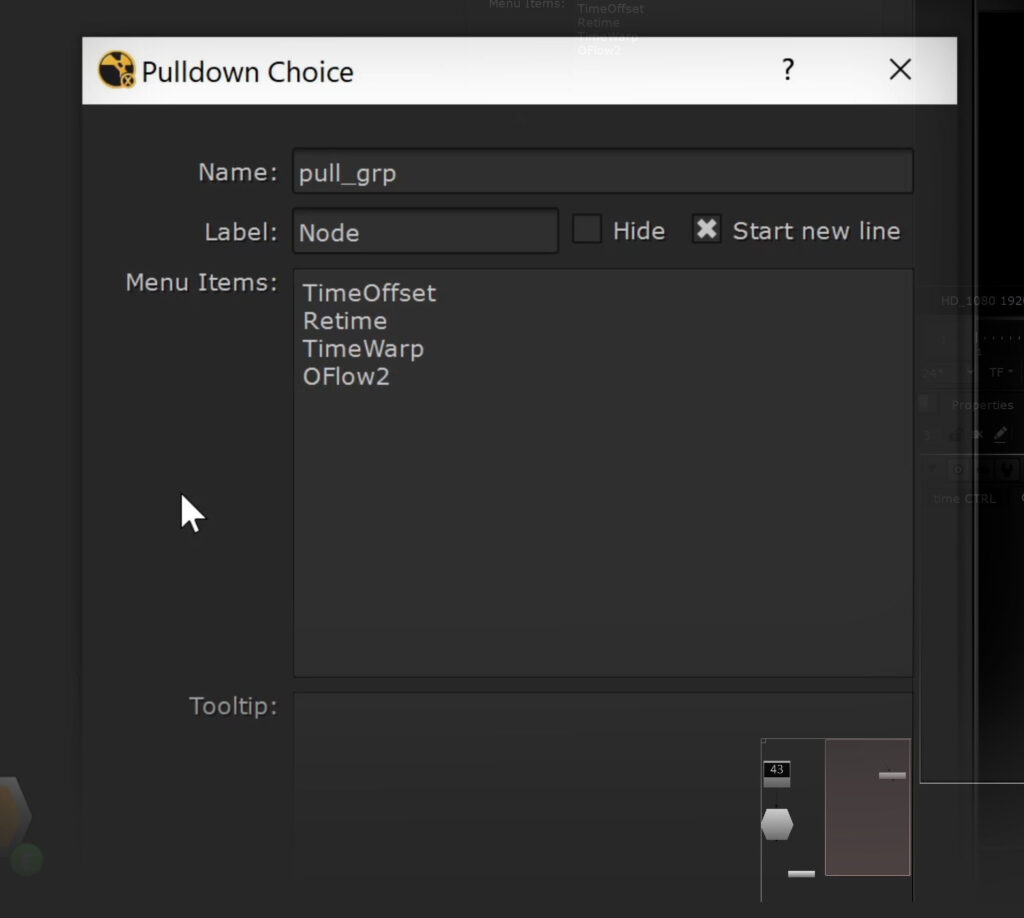
Now I will create a new tab with a pulldown menu that will enable us to switch between different retiming nodes.
I want to use the following nodes: TimeOffset, Retime, TimeWarp, OFlow2 (since this is how Nuke calls the latest version internally) and Kronos.
knobChanged()
It’s time to take advantage of Nuke’s callback knobChanged().
At this point I have to refer you to the last episode of Nuke Timeout – Episode 05 – if you are not familiar with this topic. It quickly introduces the concept of using this feature and will bring you up to speed.
As a quick summary:
Every node has an invisible knob called knobChanged(). You can assign a function to it and it will only get executed once you change a specific knob – in our case the pulldown menu knob for our retime type selection.
Ok, let me show you the function that we will assign to it. I created this python file in our .nuke environment.
import nuke

def kc():
    # collecting node and knob
    n = nuke.thisNode()
    k = nuke.thisKnob()
    # defining expressions to pass down to retiming nodes
    offset_expression = '(compStart - elemStart) - (frame - compStart) * speed + (frame - compStart)'
    retime_expression_in = 'parent.elemStart'
    retime_expression_out = 'parent.compStart'
    retime_expression_speed = 'parent.speed'
    misc_expression = 'parent.outFrame'
    # going into the Group node
    n.begin()
    input = nuke.toNode('Dot')
    input_dep = input.dependent()
    del_node = input_dep[0]
    n.end()
    # leaving the Group node

    # check for trigger knob
    if k.name() == 'pull':
        # storing selected value from pulldown menu
        selection = k.value()
        # going into the Group node
        n.begin()
        # checking if retiming node placeholder is present
        # if yes - delete it
        if not del_node.Class() == 'Dot':
            nuke.delete(del_node)
        else:
            pass
        input.knob('selected').setValue(True)
        # create retiming node based on pulldown menu selection
        time_node = nuke.createNode(selection, inpanel=False)
        time_node.knob('selected').setValue(False)
        # passing down the expression and adjusting values based on the node class
        if selection == 'TimeOffset':
            time_node.knob('time_offset').setExpression(offset_expression)
        elif selection == "Retime":
            time_node.knob('input.first_lock').setValue(True)
            time_node.knob('output.first_lock').setValue(True)
            time_node.knob('input.first').setExpression(retime_expression_in)
            time_node.knob('output.first').setExpression(retime_expression_out)
            time_node.knob('speed').setExpression(retime_expression_speed)
            time_node.knob('before').setValue("continue")
            time_node.knob('after').setValue("continue")
            time_node.knob('shutter').setValue(0)
        elif selection == "TimeWarp":
            time_node.knob('lookup').setExpression(misc_expression)
        elif selection == "OFlow2" or selection == "Kronos":
            time_node.knob('timing2').setValue('Frame')
            time_node.knob('timingFrame2').setExpression(misc_expression)
        # leaving the Group node
        n.end()
We can now assign this code to the knobChanged knob of our Group node.
The placeholder node we are using right now is the TimeOffset node. Let’s switch nodes.
Our knob function works and it replaces the current retiming node with our new selection.
As you can see we can switch through all nodes and still keep our retiming including speed.
I usually start with the TimeOffset and then based on if I have to use frame interpolation or other features, I’ll switch to other retiming nodes.
Dummy Node inside the Group
Something very important:
Although we told our Group node to only run the actual node switch script when we change values in our pulldown menu, it will still have to run the part that checks if we are using this knob or not – every time a parameter of the Group node changes – even if it’s only the position.
This can have a negative outcome on your nuke script interactivity.
I would like to thank Attila Gasparetz who made me aware of a very interesting work around by MJT.
Instead of assigning the python script to the Container Node, we will create a Dummy Node to carry our pulldown menu and place it inside the Group.
The only thing I have to change in my python script is changing nuke.thisNode() to nuke.thisGroup(), since we now have to communicate one level up in order to access our container controls.
Now we can assign the script to the knobChanged() knob ouf our Dummy Node inside the group.
In our Container Node we then pick the pulldown menu, to access it directly from outside the group. Switching between retiming nodes works and since the actual Dummy Node doesn’t move around inside the group, our script doesn’t get executed until we actually use the pulldown menu.
Polishing the Container Node
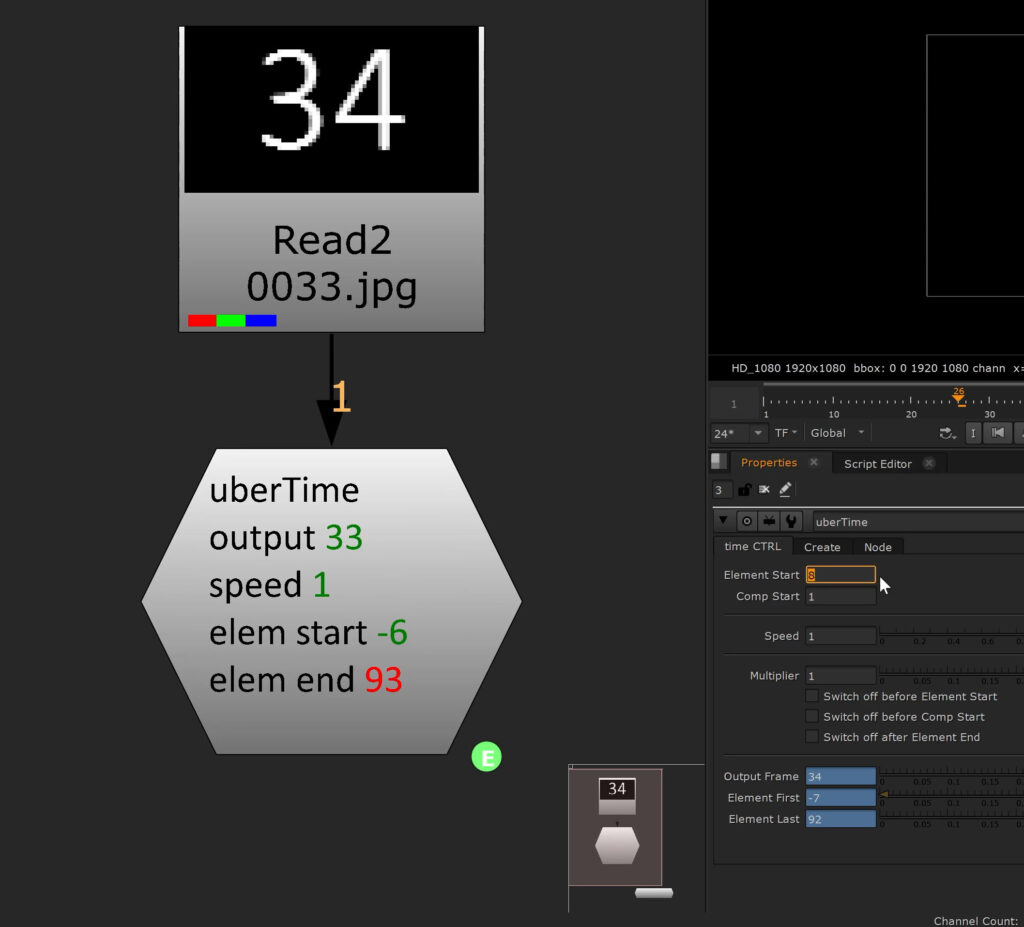
In the beginning I was complaining about the lack of visible information we have when using multiple retiming nodes. To solve this, we will use some TCL in the node’s label, so we can see the output frame and speed as well as the new in and out points of our retimed element.
<center>output <font color='green'>[value outFrame]</font>
speed <font color='green'>[value speed]</font></center>
Since I want to get a visual cue if my retimed element starts later than the actual shot frame range in-point, I will use a TCL if statement that will switch the frame number color from green to red.
And I’ll use the same code for the last frame.
<center>output <font color='green'>[value outFrame]</font>
speed <font color='green'>[value speed]</font>
elem start [if {[value elem_first] <= [value root.first_frame]} {return "<font color='green'>[value elem_first]</font>"} {return "<font color='red'>[value elem_first]</font>"}]
elem end [if {[value elem_last] >= [value root.last_frame]} {return "<font color='green'>[value elem_last]</font>"} {return "<font color='red'>[value elem_last]</font>"}]</center>
That way we get a great overview of what’s actually going on and we can quite easily notice if our element is running out of frames within the shot.
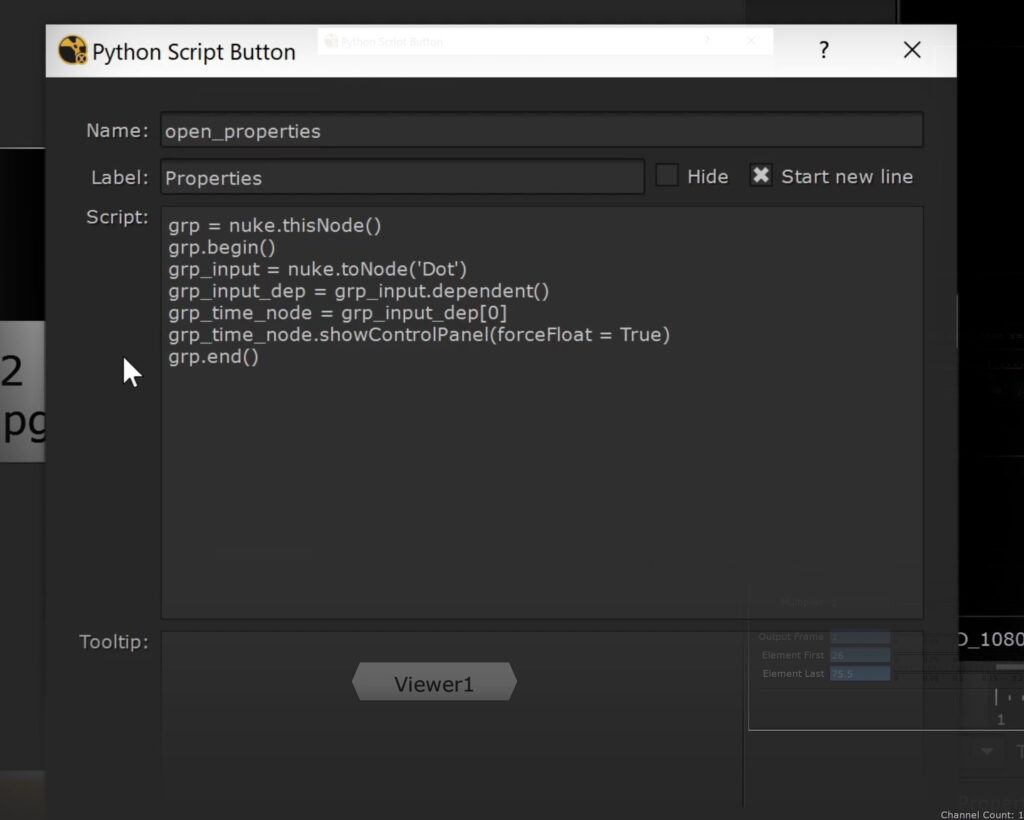
Another useful feature is to add a button that lets you open up the properties of whatever node you’re using inside. That way we don’t have to expose every single knob of the retiming node but they are accessible really quick.
Another neat thing to add are checkboxes you can use to define what happens before the start and after the end frame of an element – as well as before the comp start frame.
I set up switches inside the Group node that I connected to those checkboxes via expressions, so I can switch to black in those specific situations if needed.
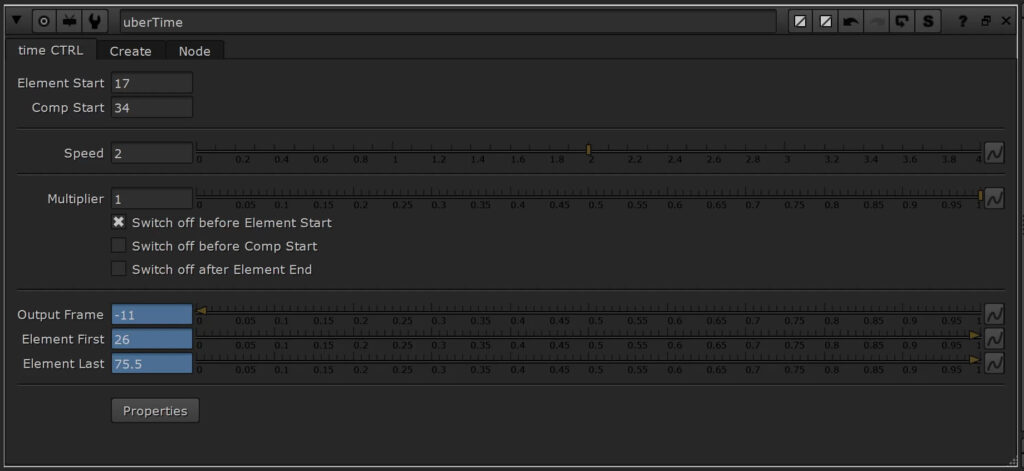
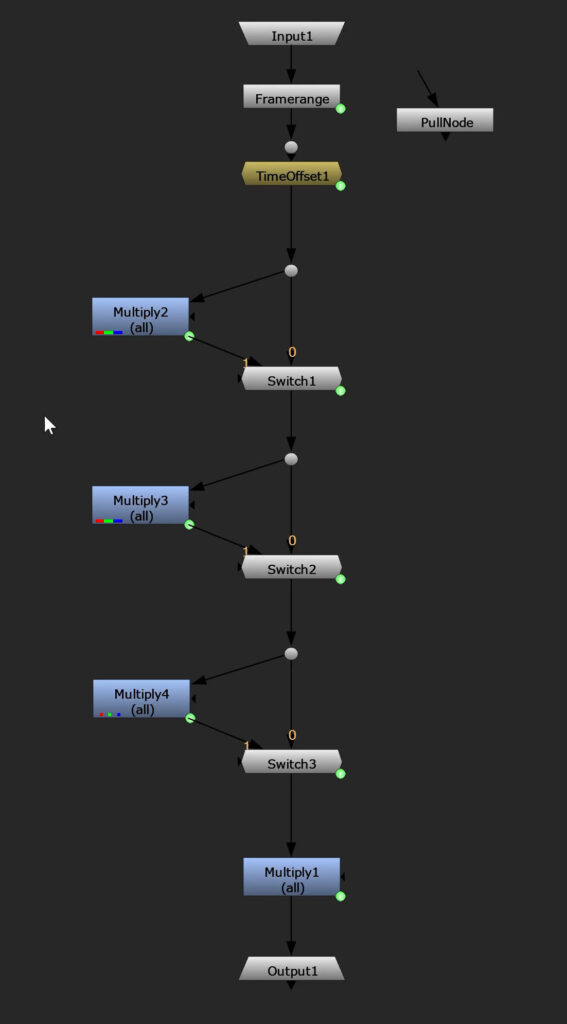
Also, to make it even more efficient, we should display the class of retiming node we are using internally, so we can see what’s going on with just one glance at it.
<font color='green'>[value pull_grp]</font>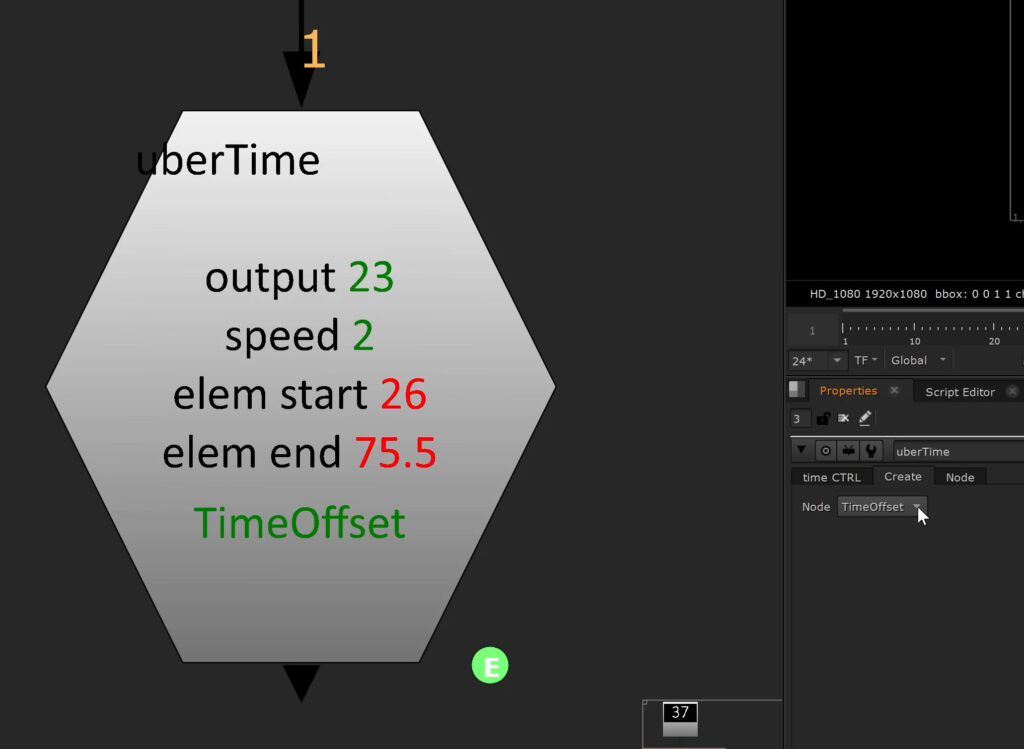
Alternate Setup
As an alternative – if you don’t feel comfortable with knobChanged and Python – you can connect the node pulldown menu to a Switch Node via an expression that changes the input to whichever retiming node you selected.
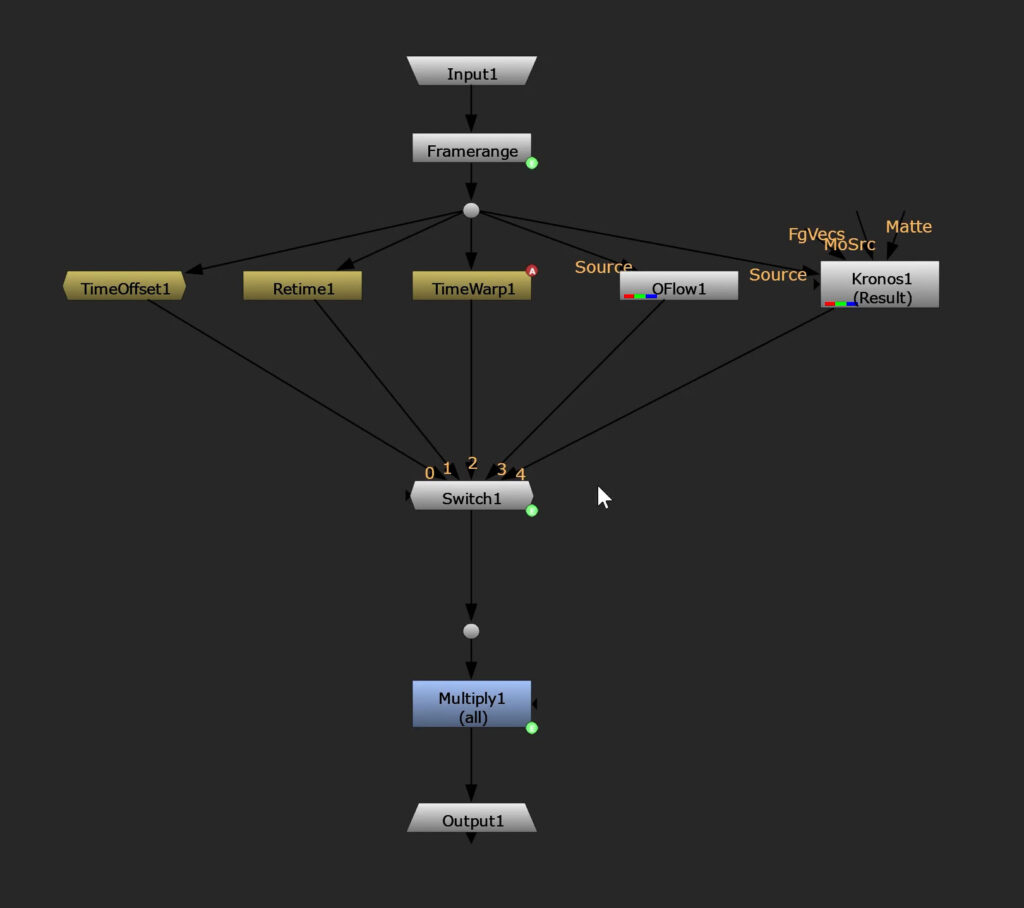
That way you have to carry around all of the nodes inside the Group though.
One advantage is that everything you set up in the properties of each node will be saved even after you’ve switched to a different node. The first approach deletes and recreates fresh nodes every time.
You can download the Group Node and its corresponding Python scripts here: uberTime
